Pages

Tuesday, July 31, 2012

Mixed Berry Jam


When I was a little girl, my favorite meal was peanut butter & jelly sandwiches. I could have eaten them all day, every day if allowed. It wasn't until I became a teenager and had to go strawberry picking that my love for those PB&J sandwiches dwindled. (So I could buy my own $40/pair jeans. Intelligence is NOT a virtue. Thankfully.) Seriously, what was my mother thinking sending me strawberry jam? It was cruel I tell ya.

After the Mister & I got hitched, it took a couple of years before the Betty Crocker Gene kicked in. During those years, I relied on store-bought jam. Now, if that's all you can do, so be it, but making jam at home is so simple, there's really no excuse not to. Unless you don't like jam. But that's just silly. Everybody likes jam.

Please don't tell me otherwise, this is my own little bubble.

Back to jam. It is good. And with berries at their peak, it's time to make some!

This recipe uses Clear Jel instead of pectin. You can use pectin, just follow the directions on the box. I'm using the Clear Jel for a couple of reasons.

1. It's very inexpensive.

2. It's simple.


Clear Jel is derived from corn starch and is used commercially in bakeries. One of the advantages of using the Clear Jel instead of pectin is that it requires less sugar. It's also easier to tell if the jam is setting up properly. The only problem with the Clear Jel is that it has to be mixed with the sugar before adding it to the berry mixture as it doesn't dissolve very well on its own. Or so I read. Instead of testing that theory, I just went with it and it worked. Beautifully, I might add. Clear Gel can be found in stores that sell canning equipment, or online.

~The Players~

4 cups crushed mixed berries (I used raspberries, wild blackberries, blueberries, and a couple strawberries that didn't find their way into a certain 12 year old's mouth.)
1/4 cup lemon juice
7 Tb. Clear Jel
1-1/2 cup sugar


Add the lemon juice to the berry mixture. Combine the Clear Jel with 1/4 cup sugar.


Add sugar/Clear Jel mixture to the berries and stir well.


Bring to a boil, stirring constantly. Add the remaining 1-1/4 cup sugar and continue to cook and stir for 1 minute. Remove from heat and pour into jars. Wipe rims and place 2 piece lids on, securing tightly. Process in hot water bath for 10 minutes. 

Makes 3 pints or 6 half-pints.

This post is linked to Frugal "I Did It!" Tuesdays and
Laura Williams' Carnival of Home Preserving.  

Monday, July 30, 2012

Chickpea Fritters and a New Giveaway Winner


It's not very often that I eat something fried, but when I do it has to be worth my time and effort. This is the time of year that I would be thinking about making Zucchini Fritters, but since the garden is slow on production, I improvised.

With chickpeas.

Chickpeas, or garbanzo beans, are a staple in my house. I love them in hummus, salads, chili, and now fritters. My youngest granddaughter has been known to eat an entire cup of chickpeas in one sitting. And she's only 16 months old! (She must get her good taste in beans from yours truly.☺)Low in fat, but high in fiber and folic acid, chickpeas are a great way to go meatless without sacrificing protein. They are also incredibly inexpensive, which makes this a very frugal AND gluten-free dish.☺

~The Players~

1 cup gluten-free flour blend (*see below for blend)
1-1/2 t. baking powder
1/2 t. sea salt
1 egg, beaten
3/4 cup milk (can use unsweetened almond, rice, or hemp milk, if desired)
1 bunch green onions, chopped
1/2 cup chopped sweet onion
1-2/3 cups chickpeas, rinsed and drained 
3 Tb. chopped fresh cilantro
3 Tb. chopped fresh parsley
sea salt & ground pepper, to taste
sunflower oil, for frying

*Gluten-free flour blend: 1 cup brown rice flour
2/3 cup sorghum flour
1/3 cup tapioca flour/starch

Sift flour, baking powder, and salt into a mixing bowl and make a well in the center. Add the egg and milk and stir into the flour. Use a whisk to make a smooth batter.


Stir in the onions, chickpeas, cilantro, and parsley.


Heat the oil in a large, heavy skillet. (Cast iron is great!) Add the batter in approximately 1/4 cup sized proportions. Sprinkle with salt & pepper.


Cook for 3-4 minutes; carefully flip the fritter over and cook until golden brown, approximately 3 minutes.


Drain on paper towels. Keep warm while you fry the remaining fritters. Add more oil to the pan as needed.

Enjoy!

*This recipe was adapted from the cookbook, Gluten, Wheat, & Dairy Free.

Sooooooo....since I didn't hear from the first giveaway winner, I have a new winner of the Ball Blue Book of Preserving. Even though it's technically not blue any longer. Winner #2, courtesy of random.org is...
 
Carol Sue!

Congratulations Carol Sue! Please email your mailing address to kimberlyj9 @ live . com (no spaces) and I'll get your book right out to you!


Sunday, July 29, 2012

Lessons From Our First Fair

A couple of weeks ago, a lady from our church mentioned that we should enter our turkeys in the county fair. My Mister and I listened, thought about it, then promptly forgot as soon as we walked away.

Because all we can think about is Tilly and her delicate condition...


...and the fact that we're still waiting for the big event.

But boys never forget conversations that revolve around fairs, ribbons, and the potential to earn a little cash. So the night before the fair opened, Father and Son made a quick trip into town with Bourbon Red Fred & Ethel2, and our Chocolate's, Hershey & Nestlee.

Now, we raise free-range turkeys, and to load up 4 full-grown birds (into dog crates), and drive them into town is no easy task. Here's what we learned about trying to take country turkeys into the city.

1. Turkeys do NOT appreciate being stuffed into a crate that has the lingering scent of dog vomit from last year's vacation. Especially when there are 2 being stuffed into the same crate.

2. Flogging is an action word. And sometimes makes a 12 year old boy cry. In public.

3. There's a lot of turkey poop that comes out of a turkey who doesn't wish to be bouncing around in the back of a pickup truck. Which tends to be slippery.

4. The sound of a turkey gobbling is amplified when it enters the city limits.


5. City folk don't understand turkey talk. Or the poofed up, ruffled feathers of Fred and Hershey.

6. Some city folk can even mistake a turkey's vocal talent for that of a Fantail Pigeon...who just so happened to be on the other side of the wall.

7. There are people who have never seen a live turkey. With its head still attached.

8. City folk are never too old for a biology lesson.

9. A turkey hen who hasn't laid an egg for a while, will start showing off laying as soon as she's away from the coop. As in, an egg a day.


10. Boys who complain about having to be responsible for the care of the turkeys, have no problem taking responsibility for the Junior Champion of Show and Best of Class ribbons.


11. When the head of the poultry barn tells a boy that he has the potential to earn $15/bird with a minimum of 10 birds entered, math suddenly becomes that boy's favorite subject.

12. Mom's who get tired of talking turkey, decide that next year, we're going to enter pigs too.


Because somehow, this Mom can relate to that a little easier.

**I haven't heard from the winner of the Ball Blue Book of Food Preserving, so if I don't hear from Aimee by Monday evening, I will be drawing another winner!

This post is linked to the Homestead Barn Hop and The Morristribe's Homesteader Blog Carnival.

Tuesday, July 24, 2012

And The Winner Is....

 Definitely receiving the Ball Blue Book of Preserving. 
 
Minus this exact cover.
 
 
 Apparently the Ball people decided to change things up a bit, so they replaced the above cover with this one...


But don't judge a book by it's cover, this is still the exact same book. With a facelift. And something delicious on the cover.

Trust me, it's just peachy

Sorry. I couldn't resist.

So, without further ado...

The official winner, courtesy of Random.Org, is...

Aimee! 

Congratulations Aimee!!!

Please send me an email with your address to: kimberlyj9 @ live . com (no spaces) and I will send your new book to you!

Thanks to everyone who participated! Stay tuned for another giveaway soon...☺

Monday, July 23, 2012

Back to Meal Planning

Recently, I took a little break from planning meals. I guess I wanted to see what it felt like to fly by the seat of my pants. Or maybe it was my way of rebelling against the system. Okay, not really, but sometimes life has a way of making a person slow down. Some things had to give so other things could happen.

Fact is, I was tired. And there was a reason for it other than just my thyroid issue. After seeing a specialist, I was diagnosed with low levels of vitamin D. Go figure. Around the Pacific Northwest, this is a common ailment, but not something that is routinely tested. Low levels of vitamin D can cause fatigue, achy muscles/joints, unexplained pain, mood swings, inability to lose weight (particularly in the abdomen), depression, food allergies/intolerance, and sleep irregularities. Combined with the hypothyroidism, it's no wonder why I didn't feel like myself!

But now, I'm back. And better than I've been in a long time. Because now I have answers that make sense. Now I have hope. And now I see the light at the end of a very long tunnel.

Going without a meal plan was a good experience for a short time. We tried new recipes, used up older ingredients in the pantry, and have almost completely cleaned out 1 entire freezer. We've replaced the wheat berries with gluten-free flours and beans, making it much easier to implement a plan. And while I have no totals on money spent for the months of May and June, I can honestly say that I don't care. Having a full pantry of usable ingredients is more important to me than knowing how much we spent to get there.

Starting now, I'm back on track with both the meals and the planning. And beginning August 1st, I'll be back on track with the budget.

Because really, what else could go wrong?

Never mind. I'll wait to be surprised.☺

Here's what's cookin' this week...

~Monday~
B: Simple Soaked Oatmeal with berries & almonds
D: Roasted chicken, Chickpea Fritters (new), green salad with Bleu Cheese dressing

Prep: Cook 8#'s ground beef. Make 4#'s Sloppy Joe mix and 4#'s taco meat and freeze for later.
Refrigerate 2#'s Sloppy Joe mix for Thursday.

~Tuesday~
B: GF Lemon Poppy seed Muffins, venison breakfast sausage
D: Meatloaf, Broccoli Salad, Roasted Rosemary Red Potatoes

Prep: Soak dried beans.
Make yogurt.

~Wednesday~
B: Cinnamon Spiced Granola & Yogurt Parfaits
D: Salmon Patties, (I'm replacing some of the ingredients with gluten-free options.) Macaroni & Cheese, green peas, Tarter Sauce

Prep: Cook 4 whole chickens in stock pot. Shred and freeze in separate bags.
Start chicken stock. (I will pressure can this on Thursday.)

~Thursday~
B: Quiche Lorraine with leftover sausage
D: Sloppy Joes on GF buns, 3-Bean Salad

~Friday~
B: GF Blueberry Scones (new), Kefir Fruit Smoothies
D: Grilled T-bone steaks, Baked potatoes (on grill), green salad with Bleu Cheese dressing

~Saturday~
B: Cinnamon Spiced Granola & Yogurt Parfaits
D: Fancy Baked Beans, GF Cornbread, Strawberry/Spinach Salad with Poppy seed Dressing

Prep: Place frozen pasta sauce in refrigerator to thaw.

~Sunday~
D: Pasta with Spicy Turkey Sausage Sauce, green salad

*I am doing a lot of freezer cooking while our weather is still cool. But more on that later...☺

This post is linked to Menu Mondays.


Sunday, July 22, 2012

A Garden Update

Peter Piper picked a peck of pickled peppers. If Peter Piper picked a peck of pickled peppers, where's the pickled peppers Peter Piper picked?

Not here.

Yet.

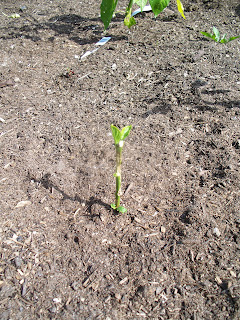
Today, I planted my second crop of lettuce. Funny thing is, I don't remember harvesting the first. Between the slightly disappointing summer weather, the attack of the killer slugs, and my mediocre watering skills, the garden has gotten off to a pretty rocky start. 

Something's been eating well.

I'm happy to say, we're finally winning the war against the slugs. And let me tell you, it has been a war of epic proportions. Besides the pepper plants, the slugs have decimated the lettuce, spinach (I even questioned whether we had remembered to plant the spinach!), the Swiss chard, and the cucumbers. They had just discovered the squash plants when we declared war.

New growth, thanks to some strategically placed copper tape!

As far as the slugs are concerned, I think we can finally claim victory.

See the little peppers?

Now if we could only get the sunshine to cooperate.

Some of our crops are doing well with the cooler weather though.

The beans love this weather. The corn? Not so much.

We'll add some fish fertilizer this week and hope that encourages the corn to reach for the sky. Right now they're not even reaching my knees. And that's not too much of a stretch.

We made our first trip out to "The Island" and picked marion and raspberries for the freezer a few days ago. I didn't think we were going to get any from our own vines.

Madison thinks the "wazzbewwies" are liking the cooler temps too.

Now that the granddaughters have discovered the berry patch, I guess we'll be visiting "The Island" again...soon.

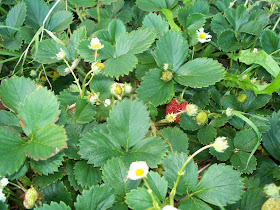
And finally, it seems our strawberry plants have decided to participate in this year's harvest. For 3 days I watched and waited for the first red juicy berry to ripen. 

Apparently, someone else was too.

All that remains of our first berry.

Good thing I was smart enough to provide a decoy...


this is the one I really wanted.☺

**You still have time to enter to win "Ball's Blue Book of Food Preserving!" The giveaway ends Monday night and a winner will be drawn and announced on Tuesday. 

Will it be you?


Thursday, July 19, 2012

The Countdown Begins...

My Mister has been working on the stalls in our barn area for the last several days. Never mind that it has taken 9 long months to come up with a plan, the fact is, we have one now.

And none too soon.


Miss Waltzing Matilda Mook  is ready to burst at the seams. And with only 9 waddling days left, she just might make it to the end without exploding. Tilly's starting to show signs of the upcoming event; her hips have started to hollow out, her belly is jumping all over the place, her bag is swelling, and her girlie parts are looking a little...well...grody. I'll spare you the visual. You're welcome.

The Barn


As you may, or may not already know, we are lacking a barn. While I would love a big, red barn, it's just not in the budget. So, we're taking our big, green shop and re-converting the back into a barn area for the cows. And maybe some other animals that have yet to be decided. (Actually, I've decided. It's the Mister who needs convincing.)

We started the demolition of the back room a couple of months ago. Now it's time for the magic to happen. First, we needed to build a tack/feed room...

Walls going up

The door was found in the loft of the shop.

And it works!

The tack/feed room

Next, the frame for the made-from-scratch stanchions had to be built...

Rough-cut lumber, and scrap pieces of wood are being put to use.

Then the stanchions themselves...

More scrap lumber

Still so much to do! 


We still have to finish the stanchions, build the feed troughs, add the dividers, and put in the lights. I say we like it was really we, but really, it was we without the me. I took pictures. And brought iced mocha's. And wiped sweat off the Mister's brow.

Have I mentioned that my Mister went back to work today? Oh boy.


Breathe in. Breathe out. Just stay calm. And hope that Tilly is like most first-time mothers.

Late.

**There's still time to enter the giveaway for the book, Ball's Blue Book of Food Preserving. Contest ends Monday night and winner will be announced Tuesday!

Wednesday, July 18, 2012

Boys and Firewood


Chopping firewood is not my favorite chore. The fact is, at 5'2, I'm just not tall enough to get enough momentum with the axe to actually make any kind of a dent in the firewood. My "chops" are more like bounces and have the ability to cost us thousands of dollars in trips to the emergency room, followed by months of rehabilitation with the chiropractor. Really, I'm saving us money. At least, that's what I've been telling myself. Truth is, I lack upper body strength and the motivation required to get some. But boys, they are a different breed.

They actually like to cut firewood.

Maybe that desire to cut a tree into smaller pieces comes from our hunter/gatherer ancestors. Maybe it comes from a boy's need to demolish anything he sees. Maybe boys just have more aggression built up than us girls. 


Have you ever noticed that when a boy decides to work on the firewood pile,


he always pulls the largest pieces out first?


Maybe boys have something to prove. Especially if it's the youngest-of-9 sort of boy.


Maybe boys just have a unique desire to build and stack. Perhaps it stems from their Lego-building days and never having quite enough pieces to build their life-sized dreams.


Or maybe, boys have yet to realize that it's work and like to chop firewood because they thinks it's fun.


And maybe we should just keep that between us for now...☺

**Have you entered the giveaway yet? Hurry! You only have a few more days to enter to win!


Monday, July 16, 2012

Dehydrating Apricots and a Giveaway!


I'll be honest. I'm not a fan of apricots. In fact, I never have been. To me, they're peach imposter's. Posers. In my eyes, this humble little fruit will never rise to the same level of greatness as their larger cousins. Nor will they ever be a favorite of mine. But if they are dehydrated, their likeability factor rises tremendously.

Apricots are high in potassium, fiber, and vitamins A & C. Once dried, apricots can be used in many ways; added to baked goods, sauces, granola or oatmeal, trail mix, or eaten plain. My favorite way to use dried apricots is in place of raisins in oatmeal cookies. Yum!

Dehydrating apricots is a simple process. If you have a dehydrator, or access to one, a knife, some lemon juice, and a bowl is all you'll need.

Here's how:


Fill a large plastic or glass bowl with 1 gallon of cold water. Add 1 cup bottled lemon juice to the water. This will keep the apricots from turning brown. (As they dry, the apricots turn a yellowish brown, but that is normal.) 


Wash the apricots in cold water. Cut each apricot in half and carefully remove the pit. Place the halves in the lemon water. Continue until bowl is full, but all of the apricots are fully submerged. Allow to soak for 10 minutes.


Remove from water and gently shake excess water from the apricots. Lay cut side down onto dehydrator trays, being careful not to crowd the fruit. This will allow the air to flow around and dry the apricots evenly. (I actually added more to the above tray.)


Set the temperature to 130F. and plug the unit in. Allow the fruit to dry until the pieces have no moisture pockets in them (which will cause mold to occur), but are not brittle. If they get too dry, don't worry, they can still be used in recipes after rehydrating.


With my dehydrator, I dried the fruit for approximately 24 hours, rotating the trays once. (The newer dehydrators will probably take less time; consult your owner's manual for their suggested times.) Mine were probably done at about 20 hours, but I refuse to get up in the middle of the night unless someone leaves the all-you-can-eat buffet sign on in the chicken coop. Priorities, you know.

Speaking of priorities...
  

How about a giveaway!?!


Once of my favorite books on preserving foods is the Ball Blue Book of Preserving. Not only does it have simple canning instructions for the beginner, it also has some fancy schmancy recipes, like; Apricot-Orange Conserve, Fig Pickles, Chow-Chow Relish, Clam Chowder Base, Spiced Pineapple in Pineapple Juice, and Curried Fruit Compote. There are recipes for preserving dairy, freezing fruits, veggies, and pie fillings, dehydrating foods, and making jerky. I cannot tell you how many times I've look through this book. The pages of mine are dog-eared, and many of the pages have to be pulled apart from all the sticky residue. But I love it. And it loves me. I own several different food preservation books,  but this one is my favorite, hands-down.

So, here's how to enter:

*You must be a follower of this blog. I'm sorry to have to require this, but my last giveaway yielded a lot of anonymous comments and even more spam. This will count as 1 entry. Already a follower? Leave me a comment telling me so, and you're entered!

*For a second entry, leave a comment telling me what foods you're excited about preserving this year. New to food preservation? That's okay~what would you like to learn?

Hurry ~ this giveaway ends next Monday! I will announce the winner on Tuesday, July 24, 2012. Good luck!!