Showing posts with label Breads. Show all posts

Sunday, May 27, 2012

Sunflower Muffins


If you've followed my blog for very long, you'll know that in January, my daytime life changed with the discovery of Banana Nut Muffins. Oh my. These are the nectar of the monkey gods, and a throne plate from which I will gladly bow to eat from for the rest of my life.

Then I did. Not for the rest of my life, but for the last 5 months these muffins have been a staple of my new gluten-free morning lifestyle.

But as life usually does, a monkey wrench was thrown into the mix. (Pun wasn't intended, but I left it there, so I guess now it's intended by default. And being too lazy to change it. Cause that's how I roll.)
I ran out of shelled walnuts. Yes, I could have shelled more, but operating a nut cracker under the influence of only 1 cup of coffee while wearing a bathrobe could be construed as a dangerous task. At least, that's what the warning label should say.

Then something wonderful happened.

My daughter went to a women's tea at our church where one of the door prizes was a cookbook called, "Gluten, Wheat, and Dairy Free." She didn't win it, but the lovely lady who did allowed my sweet girl to bring it home for me to peruse. And I did. Then I photo-copied half the book. I'm sure there is some copyright laws I may or may not have broken, but I was desperate for something new. Something different. Something that didn't involve dangerous kitchen equipment.

I must warn you though, these muffins are like sunshine in a cup. Or muffin tin. Or cupcake liner. They cause spontaneous smiling, and unintentional moaning. You should also know that Sunflower Muffins freeze well, so double the batch and save some for later.

By the way, I felt a little guilty about the whole copyright infringement thing, so I bought my own copy of the book. Just in case they were serious about their reserved rights...☺

~Sunflower Muffins~

~The Players~
*2-1/2 c. gluten-free flour blend (see my recipe below)
4 t. baking powder
1/2 t. xanthan gum
1 t. ground allspice
2/3 c. firmly packed light brown sugar
1/4 cup unsalted raw sunflower seeds
3 medium organic carrots, grated
zest and juice of 1 organic orange
2 eggs, beaten
2/3 c. unsweetened almond milk (can use regular milk if desired)
1/3 c. plus 2 Tb. sunflower oil
1 t. pure vanilla extract

Preheat oven to 400F. Place 12 baking cups into the muffin pan. (I LOVE silicone muffins cups!)


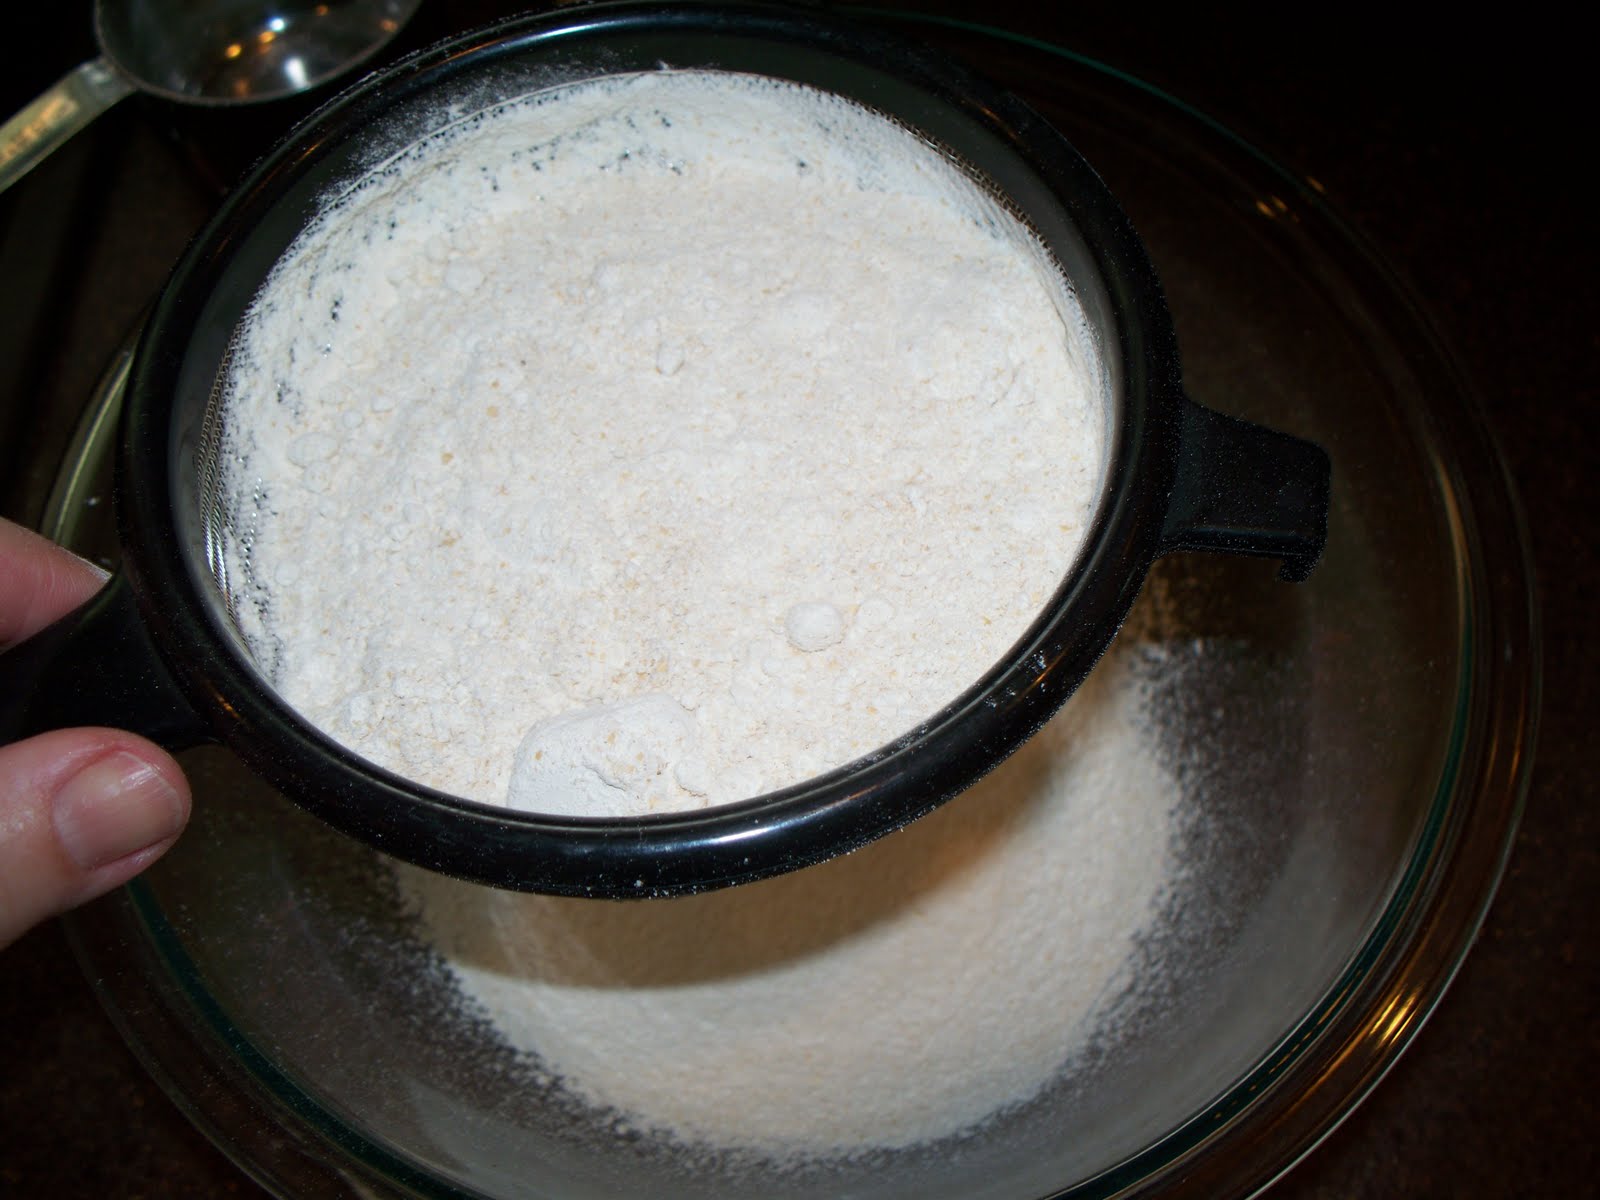
Sift the flour, baking powder, xanthan gum, and allspice into a large bowl. Stir in the sugar.

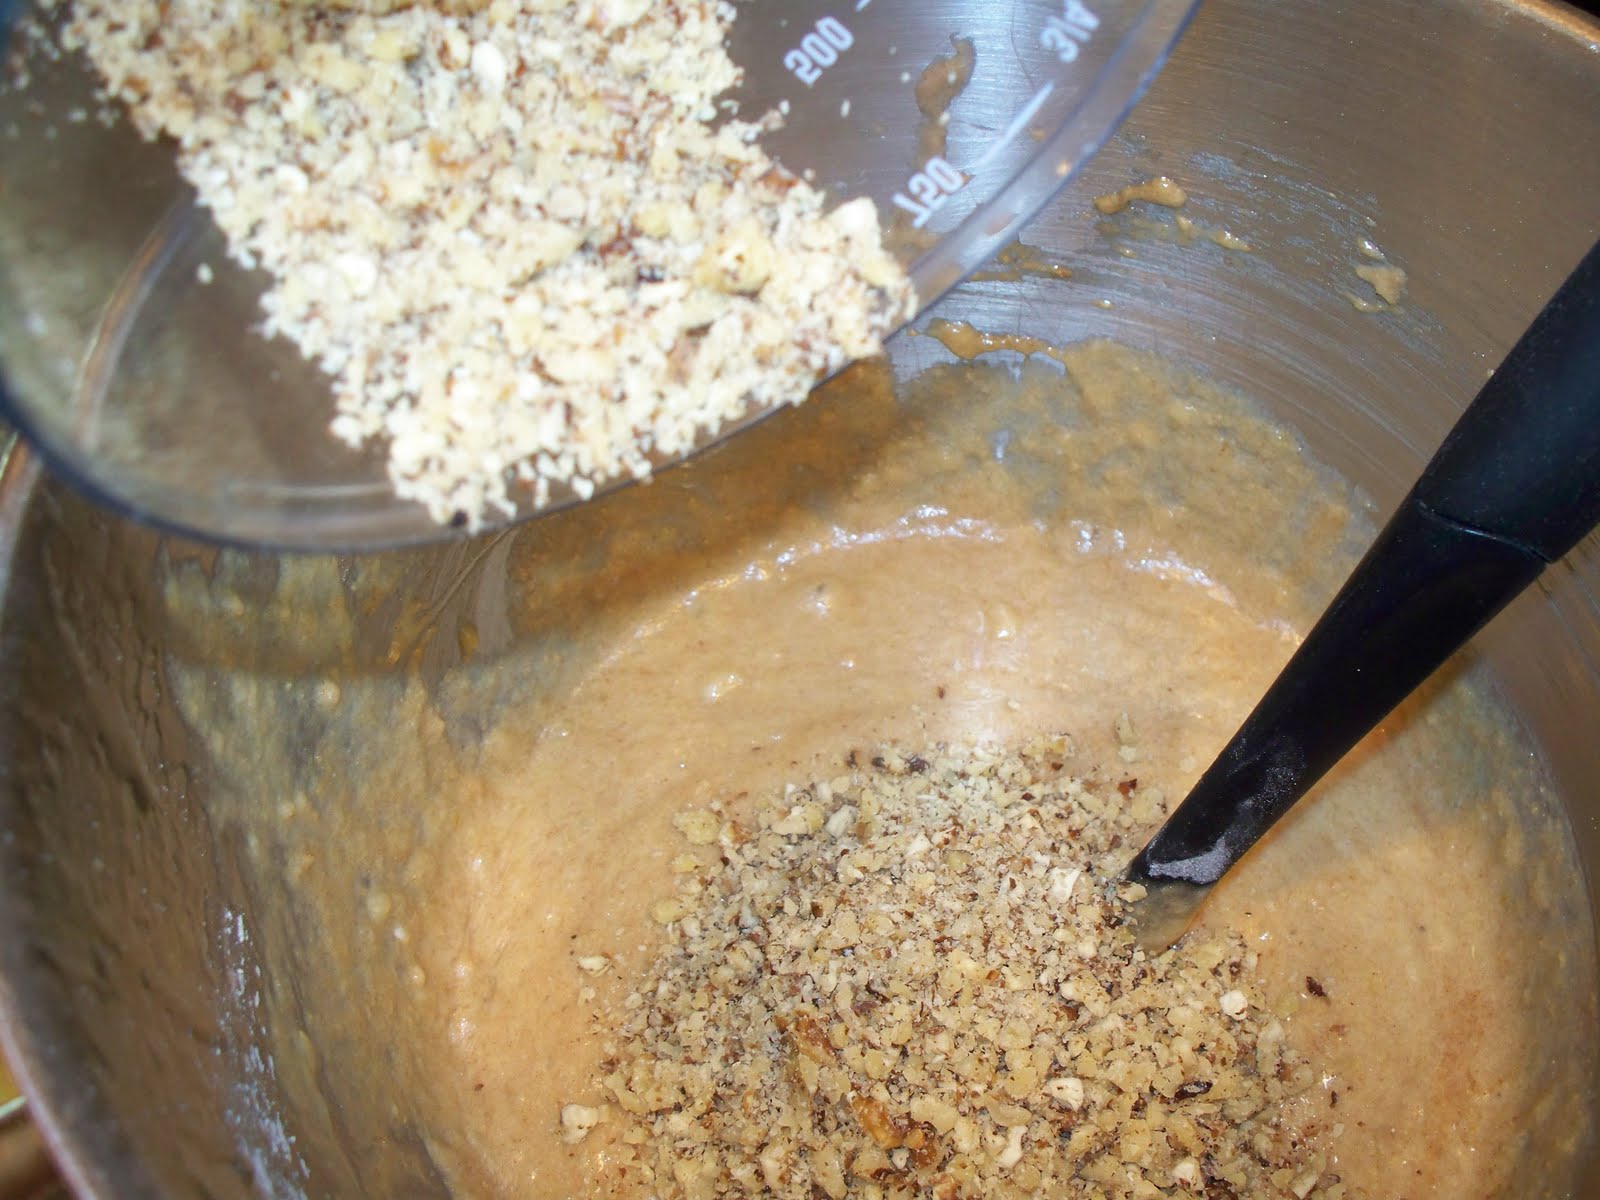
Add the carrots, 3 Tb. of the sunflower seeds, and the orange zest.


Lightly beat together the orange juice, eggs, almond milk, oil, and vanilla with a whisk.


Stir the wet mix into the dry ingredients, mixing to make a batter~it will be a little lumpy.


Spoon the batter into the baking cups and sprinkle with remaining sunflower seeds.


Bake in the oven for 20-25 minutes, or until golden brown and the centers are set. Serve warm.

*My gluten-free all-purpose flour blend is:
1 cup white or brown rice flour
2/3 cup sorghum flour
1/3 cup tapioca flour

Mix together and store in a sealed jar.

Enjoy!


Monday, April 16, 2012

Gluten-Free Buttermilk Cornbread


When I found out I had gluten allergies, I cried. Oh yes I did. A lot. See, it wasn't just going to affect how I planned and prepared our meals, or limit what I could eat, this allergy was going to be messing with my heritage.

A few years ago, I found out that I have some Pennsylvania Dutch roots. It was the same time I found out that I wasn't really Irish like I was led to believe. (I'm Scottish, and we don't have our own special beer-drinking holiday. That's probably good since I'm newly allergic anyway.) What we (see how I assumed the role?) Pennsylvania Dutch people do is eat. And cook. And eat what we cook. And because I always immerse myself in whatever role I'm playing, I live to eat what I cook.☺ 

Oh. That explains a lot.
 
I'm assuming my love of cornbread stems from those Pennsylvania Dutch roots. Have you ever seen an Amish cookbook that didn't have at least 6 different cornbread recipes in it? Giving up cornbread was like losing a little piece of myself, so the hunt began for a gluten-free version. I found a recipe for a gf cornbread that called for jalapenos, sour cream, and frozen sweet corn that had to be whirled in the food processor before it could be added to the other 40 or so ingredients. I'd start putting it together at 4 and it would be ready to eat by 8. It was delicious, but after a 4-hour prep, I was too dang tired to eat it. So I searched some more. Then I tweaked other people's recipes until we had a winner.

It's a good thing too~I think my Pennsylvania Dutch membership was about to be revoked.

It's all about the cornbread.☺
 
 
~The Players~
 
2 cups yellow cornmeal (I use fresh-ground popcorn.)
1/4 cup tapioca starch
1 Tb. sucanat (or Rapadura)
1-1/2 t. baking powder
1 t. xanthan gum
1 t. sea salt
1/2 t. baking soda
1 cup buttermilk
2 eggs
1/2 cup unsalted butter, melted and cooled
 
Preheat the oven to 400F. Grease an 8 x 8 pan and set aside. In a bowl, combine the cornmeal, tapioca starch, sucanat, baking powder, xanthan gum, and sea salt. Whisk together.
 
In a separate small bowl, measure out the buttermilk. Add the baking soda and whisk together. Set aside. (Make sure that the bowl isn't too small~the buttermilk will "grow" with the baking soda.)
 
Make a well in the center of the cornmeal mixture. Add the eggs, then the buttermilk mixture. Pour the cooled butter over the mix and whisk until just mixed. Do not over mix or the cornbread will not be as fluffy.
 
 
Pour into the prepared pan and smooth the top. Bake for 25 minutes, or until lightly browned. Because there is no flour, the toothpick trick isn't very reliable, so make sure that the bread doesn't jiggle like jello before taking it out of the oven.
 
Slather with plenty of butter and raw honey.
 
 
Enjoy!

Wednesday, April 4, 2012

Crunchy Salad-tons


Since going gluten-free, I've been having a lot of salads.

Naked salads to be exact.

Let me define what a naked salad is. It is lettuce. On a plate. There is usually some other stuff on it, but it is always missing the one thing that takes a mediocre salad and catapults it to greatness.

The croutons. 

The word crouton is derived from the French croûton, itself derived from croûte, meaning "crust". Being gluten-free doesn't leave a lot of room for anything with a crust.Which leads me to obsess about anything pertaining to crusts. Like pie. And pizza. And volcanoes. Recently, my need for crust became so bad that I actually caved and purchased a loaf of gluten-free bread. I salivated at the thought of having a toasted cheese sandwich again. 

Then I actually tasted a toasted cheese sandwich with gluten-free bread. 

Now before anybody starts telling me that I must have purchased a bad loaf, or that there are other brands out there that are actually edible, let me just say, I don't care. No offense, but a loaf of "bread," any bread,  should never, ever, ever have an expiration date that is one year away from the date of purchase. Especially if the "bread" was sitting on a regular grocery shelf and not in a freezer case. That is not bread and it is not a whole food. It's a science-experiment-pseudo-food. Because it had absolutely no flavor at all, it was very hard for me to eat it "as is". Considering the almost $5 price tag, it was also very difficult for me to just throw it to the chickens.

So I fixed it.

Now I'm back to enjoying salad greatness instead of salad mediocrity

Ahhhh...it's good to be back.☺

~Homemade Gluten-Free Croutons~


 ~The Players~

12-14 slices g.f. bread (I used EnerG/Seattle Brown Bread.)
1/2 c. plus 2 Tb. extra virgin olive oil
1 t. sea salt
fresh cracked pepper, to taste
1/2 t. garlic powder
1/2 t. dried basil
1/2 t. dried oregano
1/2 t. dried thyme
2 Tb. Parmesan cheese (from the can)

Preheat oven to 350F.

Cut the bread into 1-inch cubes. Put cubes into a large bowl. Drizzle the olive oil while mixing with a wooden spoon, making sure to lightly coat all the cubes. Add the spices and Parmesan cheese. Stir until all the pieces look seasoned.


 Spread croutons onto cookie sheet or broiler pan. Bake for 30-45 minutes, stirring often. When the croutons are crispy, remove from oven and allow to cool.


Store in an air-tight container.

The finished color of the croutons will depend upon the type of bread used. Mine ended up fairly dark, but they were so very tasty!

*This recipe will also work for regular bread too.

Enjoy!

Monday, February 20, 2012

Gluten-Free Biscuit Love

Moment of truth.

I miss bread.

I've even considered replacing my children's wall photos with framed pictures of french bread, cinnamon rolls and hot dog buns. I dream of brioche, ciabatta, focaccia, and baguette's. I want to bathe in sourdough and moisturize with pounds of butter.

It's disturbing, I know.

So while my family was busy guarding their photos and hiding the butter, I got busy looking for a gluten free quick-bread that would satisfy my need for some loafy goodness. I found a couple of different recipes that were either too flaky (meaning they fell apart before adding the butter), or they tasted like dirty socks. 

Not that I've ever tasted socks, mind you.

Just when I had resigned myself to never having a sandwich again, I stumbled upon this little gem. The original batch made 10 biscuits, and over the course of 3 days, I ate them all. By myself. I worried that they were only delicious because I was so desperate, so I made them again. And this time I shared. 

You know you've hit the big time when your daughters copy the recipe into their own personal Family Recipes book.

Even if it wasn't technically a family recipe until then.☺

~Easy Peasy GF Biscuits~
(adapted from "The Whole Life Nutrition Cookbook")

~The Players~
2 cups brown rice flour
1/2 cup tapioca flour
2 t. baking powder
1 t. xanthan gum
3/4 t. sea salt
1/2 cup cold, unsalted butter
3/4 cup whole milk

Preheat oven to 425 F. 

Combine the brown rice and tapioca flours, baking powder, xanthan gum, and sea salt in a large bowl.

Add the butter and cut it into the flour mixture until crumbly.

Slowly add the milk, stirring with a wooden spoon as you pour. Turn the dough out onto a floured surface and knead until ingredients are just combined. 

My new rolling pin made by my brother-in-law, Brian. I LOVE it!!!
Roll out dough until about 1/2-inch thick. These won't rise much, so don't go any thinner. Use a biscuit cutter or a glass to cut out the biscuits. 

Place on an ungreased cookie sheet (line with parchment paper, if desired), or a baking stone. The biscuits won't spread, so they can be placed fairly close together.

These were rolled a little too thin, but they were still delish!

Bake for 12-14 minutes, or until done. Serve with butter, jam, honey, nut butter, meat...

Or slap two of 'em together and call it a sandwich.☺

Enjoy!


Monday, January 9, 2012

Banana Nut Muffins~A True American Love Story


Once upon a time, I was addicted to daytime television. Blame it on the hours of breastfeeding I had to sit still for. Blame it on the discovery of John Stamos and Rick Springfield. Blame it on my mother. The point is, I kicked the habit.

Now I have a new daytime addiction.

Gluten-free Freckled Banana Nut Muffins.

Pure heaven I tell ya.

If I could have 1 thing everyday for the rest of my life, it would be these. Especially slathered with fresh yogurt cream cheese.

Sinful.

And way more exciting than a couple of daytime drama "has-beens"...my waking hours will never be the same again. Trust me.☺

~Banana Chocolate Walnut Muffins~
(from the book, "The Whole Life Nutrition Cookbook")

~The Players~

2-1/2 cups brown rice flour
1/2 cup tapioca flour
1/2 cup sucanat
2 t. baking powder
1-1/2 t. xanthan gum (a thickener found in the health food stores)
1 t. baking soda
1/2 t. sea salt
4 really ripe bananas, mashed
1 cup vanilla almond milk (can use regular milk)
1/4 cup melted virgin coconut oil
2 t. pure vanilla extract
1 cup chopped walnuts
1/2 cup mini chocolate chips

Preheat oven to 375 F. Lightly oil muffin tins (with coconut oil) or line with paper muffin cups.

In a large bowl, combine the brown rice flour, tapioca flour, sugar, xanthan gum, baking soda, baking powder, and sea salt. Mix well.

Place the bananas into a glass measuring cup and mash with a fork or potato masher.

Add the milk to the mashed bananas and whisk together with the melted coconut oil and vanilla. Pour the wet ingredients into the dry and gently fold until mixed. Be careful not to overmix. Gently fold the walnuts and chocolate chips into the batter.

Spoon batter into the oiled or papered muffin cups. Bake for 22 minutes or until a toothpick inserted into the middle comes out clean. Remove from oven and allow to sit for a couple of minutes in the pan before removing and placing on a wire rack to cool. Serve warm.

Makes 1-1/2 dozen.

*These freeze well, so make a double batch for later!☺

Enjoy!

Thursday, October 6, 2011

Pumpkin Spice Muffins


During the summer, our ovens are rarely used. We still enjoy bread and tasty baked goods, but they come from someone else's overly heated kitchen.

They must have air-conditioning.

Braggers.

Now that fall has officially arrived, I've been getting reacquainted with my oven. My new favorite ingredient to cook with is pumpkin. But, I've been told there is a shortage of pumpkins this year.

Please don't tell these muffins. They would be so disappointed. 

If you are unable to find pumpkin, try using a winter squash such as butternut, acorn, or a turban squash. And if there's some kind of a squash shortage that I'm unaware of, try substituting sweet potatoes for the pumpkin.

Whatever you do, just don't wander into the health food store and buy up all the canned pumpkin they have. Especially if you live in my area.

It would be a complete waste of time.

Or so I've heard.☺

~The Players~

1 cup organic white flour*
1 cup soft wheat pastry flour
1 t. baking soda
1 t. cinnamon
1/2 t. ground ginger
1/4 t. ground cloves
1/8 t. ground nutmeg
3/4 cup sucanat, Rapadura, or organic brown sugar
1/4 cup melted, expeller pressed coconut oil (no coconut scent/taste)
3 Tb. unsulphered molasses (not blackstrap)
2 large eggs
1 cup canned pumpkin
1 t. vanilla extract
3/4 cup buttermilk
raw, unsalted pumpkin seeds

Preheat oven to 400F. Grease muffin pan with coconut oil.

In a medium bowl, mix flours, baking soda, spices, and sugar. Set aside.

In large mixing bowl, beat together the coconut oil, molasses, and eggs. Add pumpkin and vanilla;  mix well.

With the mixer on low, add half of the flour mixture, then half of the buttermilk; repeat with remaining flour and buttermilk. Mix only until just combined.

Pour the batter into muffin cups. Top each with a few pumpkin seeds. Bake for 20 minutes, or until toothpick inserted in the middle comes clean. Do not overbake.

Let rest for 5 minutes in pan; remove and cool on wire rack. Makes 12 muffins.

*Use white flour to keep these from becoming too dark.

Enjoy!


This post is linked with the Homestead Barn Hop.


Tuesday, September 20, 2011

Hazelnut Pear Muffins


Note to self...

When returning from vacation, visit the garden BEFORE deciding to visit "the island" for something to can.

My last visit to Sauvie Island yielded 40 lbs. of apples, 40 lbs. of pears, 20 lbs. of tomatoes, and enough corn on the cob to nibble on for several days. I was excited to have something domestic to do after my 4 days of lounging in a boat.

While I was busy doing a happy dance in the kitchen, my children did what I should have done upon returning home. They checked the garden.


Lesson learned. (And lest I forget, my children, who never forget anything, are here to remind me...about every 15 minutes.)

Thankfully, I didn't have to can ALL of the beans.


I guess this makes us an 81% whole foods kind of family.

Back to the pears. After canning about 30 quarts of beans, 40 lbs. of pears seemed more like 400 lbs. of pears. Because I hadn't thought to check the garden beforehand, I made sure the pears were ripe and ready to go into the jars.

You know, for something immediate to do.

Oi.

So what does one do with so many pears, and not so many hours of daylight left? She makes muffins.

Lots and lots of Hazelnut Pear Muffins.

For the record, I ♥ Hazelnut Pear Muffins.


~The Players~

1-7/8 C. soft white pastry flour
1/2 C. sucanat, Rapadura, or organic sugar
1 T. baking powder
1/3 C. toasted, chopped hazelnuts
1/2 t. ground cinnamon
2 eggs
1 C. buttermilk
1-1/2 C. peeled & chopped pear

Preheat oven to 400F.

Sift flour, sucanat, baking powder, and cinnamon. Stir in hazelnuts.

Combine eggs with buttermilk and beat slightly. Make a well in the center of the dry ingredients and pour egg/buttermilk mixture in well. Stir until just enough to moisten.

Fold in pears. Batter will be slightly lumpy. Fill greased muffin cups 2/3 full. Bake for 20 minutes or until toothpick inserted in the middle of one comes out clean.

Makes approximately 16 muffins.

Enjoy!☺

Thursday, July 28, 2011

From the Farm to the Table...and the Archives

Since we're still recovering from the big "Summer-Strep-That-Only-My-Family-Would -Think-About-Adding-To-The-Sunshine-Epidemic", I'm going to re-share my Zucchini Bread recipe from last summer with you. Because I know you've got zucchini busting out the walls of your kitchen. And because this is really good.

Which is the only reason I plant zucchini!☺

Today was the beginning of summer for me.

Even though the sun has been shining since July 5 (I kid you not!), summer doesn't officially begin until we make our first run out to the local farming community, called Sauvie Island.

Located a mere 50 minutes from my house, Sauvie Island is an agricultural dream. From long-horn cattle, to fruits and vegetables, anything farm-related can be found there.

Except for soybeans.

And maybe cotton.

Really, let's not forget where I live!

Here's what I came home with today. (Oh boy, I hope my Mister doesn't read this!)


I picked up a flat of just-picked raspberries, some Walla Walla sweet onions, shell peas, French green beans, Rainier and Bing cherries, corn on the cob, zucchini that hadn't been forgotten about, and a bouquet of dried lavender.

It smelled nice and I couldn't resist.

I also couldn't resist the really cool woven bag. It was made in Ghana, Africa and I have wanted one for as long as I can remember, which was probably only since last week. Now I can pack my farmer's market goodies to the car in style.

How's that for justification?

For dinner tonight, we enjoyed the corn, stir-fried green beans with garlic and onions, and zucchini bread.
I'm sensing another visit to the farm in the very near future!

Okay, I know you want some zucchini bread too. And because I love you, I will share. But you have to bake it yourself because my love has limits. *wink*

~Zucchini Bread~
2 cups unbleached white flour
1-1/4 cup whole wheat pastry flour
1/2 t. sea salt
2-1/2 t. baking powder
1 t. baking soda
2 t. ground cinnamon
2 Tb. lemon zest
3 farm fresh eggs
1 cup unrefined coconut oil, melted
1-3/4 cup sugar
1-1/2 t. vanilla extract
3 cups grated zucchini
1 cup walnuts, coarsely chopped

Preheat oven to 350F. Grease two loaf pans.

In a small bowl, combine the flours, salt, baking powder and soda, cinnamon, and zest. In a large bowl, beat the eggs with the oil, sugar, and vanilla.
Whisk the dry ingredients into the wet, then fold in the zucchini and walnuts.

Pour the batter into the prepared pans and bake for 50-55 minutes, or until a tester comes out clean. Let the bread rest for a few minutes, then remove from the pans and finish cooling on a wire rack.
Makes 2 loaves.

Enjoy!


Tuesday, July 12, 2011

Appley-Apple Muffins


It may be summertime, but I'm feeling the need to give a quick vocabulary lesson today.

Fast food: Food that can be prepared quickly and easily and is sold in restaurants and snack bars as a quick meal or to be taken out...(Wikipedia dictionary)

Mom-is-busy-fix-it-yourself-food: Food that can be prepared quickly and easily and is found in the freezer section of the kitchen fridge and doesn't require anything more than a toaster oven and motivation to be eaten...(Mom)

During the summer, mornings are busy. Here's what a typical summer morning schedule might look like...

1. Enjoy the peace and quiet while sipping that first cup of morning coffee.
2. Open all of the windows and doors, but only after turning off the house alarm. (Very important!)
3. Pour second cup of coffee, set it down somewhere while I water the outdoor hanging flower baskets and pots.
4. Fold load of laundry that was brought in the night before.
5. Waste 15 minutes searching for the missing coffee cup that is surprisingly in the last place you would think to look.
6. Wake up kids.
7. Pour a third cup of coffee and head out to the garden to water.
8. Get side-tracked on the way to the garden by playing with the baby turkeys in the tractor, checking the bees, chatting with the cows, or listening to the Mister explain his latest technique on mole-trapping.
9. Walk down to the mailbox to retrieve the morning paper.
10. Hang load of laundry outside.
11. Close all of the windows and curtains; turn on the fans to keep the house cool.
12. Wake up kids...again.

This list doesn't include potty breaks from all the coffee, actually reading the paper, or answering any phone calls that are just a given. By the time I get around to actually fixing breakfast, it's almost lunch time and really, who wants to heat up the kitchen at that point?

In the spirit of keeping the kitchen and mom's mood cool, I'll keep the routine and load the freezer with muffins.

It's a lot safer.☺

~Appley-Apple Muffins~
(Makes 24)

~The Players~

3-1/2 cups whole wheat pastry flour (also known as soft white wheat)
4 t. baking powder
1 t. baking soda
2 t. ground cinnamon
1/2 t. ground cloves
1/4 t. sea salt
1 cup whole milk plain yogurt
2 large eggs
6 Tb. sucanat (Rapadura or dark brown sugar)
4 Tb. coconut oil
2 large Granny Smith apples, peeled, cored and grated
1-1/2 cup unsweetened applesauce
1 cup currants (can use raisins)

Preheat oven to 375F. Grease muffin tin. (I used coconut oil.) Do not use paper liners.

In a large bowl, stir together the flour, baking powder, baking soda, cinnamon, cloves, and salt. In a separate bowl, whisk together the yogurt, eggs, sucanat, and coconut oil until smooth. Stir in the apples, applesauce, and currants.

Pour the apple mixture into the dry ingredients and stir until just blended.

Spoon the batter evenly into 24 muffin cups. Bake for 23 minutes, or until springy to the touch and lightly browned.

Cool on a wire rack. Freeze leftovers in gallon freezer bags when completely cooled.

Enjoy!☺

Tuesday, May 10, 2011

Raspberry Cheesecake French Toast

Recently, my youngest son gave me the highest compliment a boy can give his momma.
 
"You should cook for money!"
 
I'm so relieved he didn't see me dancing around the kitchen prior to his arrival. Our conversation could've gone in an entirely different direction.
 
But you know something is good if your 11 year old son is willing to share with others.
 
Warning: While this is not a low-carb breakfast, it will cause uncontrollable smiles around the entire breakfast table.
 
Consider yourself warned.☺
 
~Raspberry Cheesecake French Toast~
 

~The Players~

16 slices of bread (I used homemade sourdough bread)
1 (8 oz.) package cream cheese, softened
4 Tb. raspberry freezer jam (or jam of your choice)
4 Tb. powdered sugar (or sucanat blended until very fine)
4 eggs
1 cup half & half
2 t. pure vanilla extract


In a small mixing bowl, mix cream cheese and powdered sugar until smooth. Add jam and mix until well incorporated.
 

Make sure to thoroughly lick all of your fingers before proceeding.

Trust me.

Using a wire whisk, gently whisk together the eggs and the half & half.


Add vanilla.


Set aside.

Spread cream cheese mixture evenly over 8 slices of bread. Place remaining slices on top to form sandwiches.


Melt 2 Tb. butter or coconut oil in large cast iron frying pan or a griddle.
 
Dip sandwiches into egg mixture; make sure to cover both sides completely. Cook on medium heat for 2-3 minutes on each side, or until golden brown.
 
Serve with additional powdered sugar, grade B maple syrup, or more jam.
 
Serves 8.
 
Enjoy!
 

Tuesday, April 26, 2011

Banananana Bread

I have a special bowl in the kitchen that holds some of my fresh produce. Bananas, Granny Smith apples, lemons, and the occasional orange are the usual residents. I'm very pleased with this bowl. See, it's not a typical bowl as it's square instead of round. This bowl also has a sunflower painted on the bottom of it in colors that match my new kitchen.

I also got this bowl on clearance for $4.99...regular price was $29.99.

I told you it was special.


But my bowl has a dark side. It seems that any fruit that enters the beautiful bowl, doesn't come out the same as it went in.

My Mister refers to it as "The Bowl of Death".


Personally, I think fruit is like a fine wine...the more it ages, the better it is.

Of course, I can't afford fine wine, so this is just an assumption on my part.

For me, bananas get better with age. They haven't reached their full flavor potential until there are brown spots all over them. When this happens, I peel some for the freezer and make banana bread with the rest.

One of the first recipes for banana bread that I ever received was from a lovely southern lady named Katherine. While her bread was melt-in-your-mouth delicious, it did not seem to melt off my thighs very easily. I'm not a calorie counter, a low-carber, or a non-fat foodie. I believe in eating until your satisfied, staying away from refined sugars and flours as much as possible, and slathering everything with butter. (Well, not everything. Pizza with butter is probably not a winning combination!) 

Katherine's recipe called for white flour, white sugar, butter, and vegetable oil. Other recipes that I've found have had 100% whole wheat, applesauce instead of oil, egg replacer (ew!) instead of eggs, and natural sugars of honey or maple syrup. I've even seen recipes calling for Equal!

Some things are just not right.

Until now. Well, not completely right, but you'll see at the end.

Please don't judge.

Banananana Bread

~The Players~

3 large, overripe bananas, peeled
1 cup honey
1/4 cup whole milk yogurt
2 eggs, beaten
1/2 cup unsalted butter, melted
1/2 Tb. vanilla extract
2-1/2 cups soft white wheat pastry flour (fresh ground if possible)
3/4 t. baking soda
3/4 t. sea salt
2 t. ground cinnamon
Optional: 1 cup chopped nuts (walnuts are good, but so are pecans or almonds)

In a large mixing bowl, mash the bananas.


Add honey, yogurt, eggs, vanilla, and melted butter to bananas; mix well and set aside.


In a separate bowl, sift together the pastry flour, baking soda, sea salt, and cinnamon.


Pour flour mixture into banana mixture and stir until flour is mixed in well. Don't overmix. Fold nuts into batter.

Grease 2 loaf pans.

Bake in a 350F. oven for 60 minutes, or until knife comes out clean. Let cool in pans for 10 minutes, then remove and let cool on wire racks.


Here's where I need to confess. I was in a hurry and didn't double-check my buttering of the loaf pans. Actually, I didn't get in a hurry until pan #2.


I'll just slap a little extra butter on this one.

Katherine would approve. ☺

Enjoy!


Monday, April 4, 2011

Gluten-Free Lemon Poppy Seed Muffins


Years ago, when I was a young mother, we had a muffin shop at our local mall. I remember taking my small children there, parking the stroller, toddler leash, baby sling and other paraphernalia at the entrance and letting them have the muffins of their choice. Sometimes they would choose the double chocolaty chip. Sometimes they would choose the apple strudel-y looking muffin. And sometimes they chose whatever muffin had frosting.

Kids are finicky that way.

One order always remained the same though. Mine. My favorite muffin was the lemon poppy seed muffin. It was large, fluffy, full of lemony goodness and loaded with poppy seeds, and for 20 minutes I was in total blissdom.

Of course my children spent their time dropping most of their muffins on the floor while  simultaneously spilling their apple juice, and I was usually breastfeeding discreetly under the table, trying to keep the juice from running up my baby son's nose. But with my muffin in hand, it was as close to a glorious 20 minute "break" as I was going to get while at the mall. 

Of course, as the children got older and the numbers increased, trips to the mall got fewer and farther in-between.

And then one day, the muffin shop closed.

The Atkin's diet murdered them.

Fast forward 19 years (*gasp!) and I have finally found my former bliss. Lemony goodness that rivals those good old mall muffins.

Minus the mall.

Can it get much better than that?

Since these Lemon Poppy Seed Muffins are gluten-free, I guess it can!

Lemon Poppy Seed Muffins
Level of Difficulty~Easy

~The Players~
2/3 cup organic sugar
1 Tb. poppy seeds
1 Tb. baking powder
1-1/2 t. xanthan gum
1 t. unflavored gelatin powder (I use ChillOver powder from Mary Jane's Farm)
1 t. sea salt
1 cup whole milk
1/4 cup expeller pressed coconut oil, melted (doesn't have the coconut taste)
2 large pastured eggs
juice of 1 lemon
1 t. vanilla extract
Lemon zest of 2 organic lemons


Preheat oven to 375F. Generously grease muffin pan.

Sift together the dry ingredients in a large bowl. In a separate bowl, whisk wet ingredients and zest until smooth.

Make a well in center of flour mixture and add wet ingredients. Combine until just mixed.

Divide batter evenly in muffin pan. Bake 20-25 minutes or until muffin tops are lightly browned.

Makes 12.

Enjoy!


Tuesday, February 15, 2011

Peanut Butter Breakfast Muffins


I cannot tell a lie.

I did NOT eat that miniature Reese's Peanut Butter Cup.

I ate three of them.

Maybe it's because I'm a girl, but there is something about the mixture of peanut butter and chocolate that catapults me into the land of giddiness.

In case you're wondering, it's next door to the land of denial, which I'm also well acquainted with.

Since January 1 and my doomed-for-failure resolutions, I have only consumed 3 of those little morsels of happiness. That's saying a lot when you consider that there was an entire pound of them left over from the holidays! But, I'm still a girl, and those cravings didn't end with Christmas.

Since I'm determined to cut the sugar consumption from my home to a bare minimum, it has become my mission to find ways to feed this peanut butter/chocolate addiction without resorting to secret meetings with Mr. Reese's. People might start to talk.

Because I consider myself an expert on the pairing of the nut and the bean, I can unequivocally confirm that these muffins are a winner.

And to make sure that it wasn't some kind of a fluke, I had 2.

You're welcome.☺

Peanut Butter Muffins

~The Players~
1 C. whole wheat or spelt flour (I use spelt)
1 C. rolled oats
1 T. baking soda
1/2 t. sea salt
1/4 C. natural peanut butter, creamy or crunchy
1/3 C. unsweetened applesauce
1-1/2 C. milk
1/4 C. honey
 *1 cup chocolate chips
In a mixing bowl, whisk together flour, oats, baking soda and salt. Add peanut butter and applesauce. Mix on low speed until smooth. (Unless you're using chunky peanut butter, then smooth is overrated.)

Stir in the milk and honey.

Fold in the chocolate chips.

Spoon batter into paper-lined muffin cups, filling 2/3 full. Bake at 350F. for 12-15 minutes, or until a toothpick tests clean. Cool in pan for 5 minutes; transfer to wire rack to finish cooling.

Makes approximately 20 muffins.

*1 cup of chocolate chips seemed like overkill, even for me, so the last time I made these, I dropped 5 chips into each muffin cup before baking.

Enjoy!

This post is linked to Real Food Wednesdays at Kelly the Kitchen Kop.

Monday, October 25, 2010

Back to Basics: Bread

I would like to announce the passing of a very dear friend.

While on vacation, my sourdough starter died.

It wasn't really a surprise. She had been feeling sluggish for days. I had been so busy packing and planning for the big trip that I may have neglected her, thus leading to her early demise.

And for that I'm sorry.

I would like to ask for a moment of silence as we remember my starter.


Here is my new starter.


She may be young, but by Friday will have maturity beyond her years...er....days.

In the meantime, I need bread.

Sometime ago, I purchased a book called "Artisan Bread in 5 Minutes a Day". Some of the recipes in this book were featured in a Mother Earth News issue and it piqued my interest. I mean seriously, just 5 minutes a day?

My glass was half empty that week.

But then I tried it. And now I'm hooked. It is still no substitute for sourdough bread, but in a pinch, this stuff is pretty good.

Homemade Artisan bread on the left, store-bought bread on the right

It would be easy for me to just pick up a loaf of artisan bread at the grocery store and call it good, but silly me, I enjoy reading the labels on the food I purchase.

Here are the ingredients on a loaf I bought recently. Enriched wheat flour (wheat flour, niacin, reduced iron, thiamin mononitrate, riboflavin, folic acid, malted barley flour), water, asiago cheese (pasteurized milk, cheese cultures, salt enzymes), asiago-flavored nuggets (modified palm oil, corn syrup solids, salt, monosodium glutamate, autolyzed yeast extract, soybean lecithin, natural and artificial flavors, disodium inosinate, disodium guanylate, lactic acid), wheat gluten, rice flour, salt, dough conditioners (diacetyl tartaric acid, esters of mono and diglycerides, ascorbic acid, enzymes, azodicarbonamide), yeast

Just so you know, my spell-check didn't recognize 14 of these words.

Scooby Doo would call this a clue.

Shaggy would agree.

If you are wanting to feed your family a science project, then this would qualify. But if you are looking to make a positive change toward good nutrition, take a pass on the lab experiment and try this recipe from the book. I promise, you will not be disappointed.

For this bread to have a rustic texture, you will need a baking stone, also known as a pizza stone. They are inexpensive, but really help to make a nice crust on the bread.

European Peasant Bread

3 cups lukewarm water
1-1/2 Tb. yeast (or 2 packets)
1-1/2 Tb. sea salt
1/2 cup rye flour
1/2 cup whole wheat flour
5-1/2 cups unbleached all-purpose flour
Cornmeal for the pizza peel

1. Mixing and storing the dough: Mix the yeast and salt with the water in a 5 quart, or a lidded (not airtight) food container.

2. Mix in the remaining dry ingredients without kneading, using a spoon, a 14 cup food processor (with dough attachment), or a heavy duty stand mixer (with dough hook).

3. Cover (not airtight), and allow to rest at room temperature until the dough rises and collapses (or flattens on top), approximately 2 hours. I leave it in the mixer bowl and cover with a towel.

4. The dough can be used immediately after the initial rise, though it is easier to handle when cold. Refrigerate in a lidded (but not airtight) container and use it over the next 14 days.


5. On baking day, dust the surface of the refrigerated dough with flour and cut off a 1-pound piece. (grapefruit size) Dust with more flour and quickly shape it into a ball by stretching the surface of the dough around the bottom on all four sides, rotating the ball a quarter-turn as you go. Allow to rest and rise on a cornmeal-covered pizza peel for 40 minutes. If you don't have a pizza peel, use a cookie sheet with no sides.


6. Twenty minutes before baking time, preheat oven to 450 F. , with a baking stone placed on the middle rack. Place an empty broiler tray on a lower shelf that won't interfere with the rising bread.

7. Sprinkle the loaf liberally with flour and slash a cross, or tic-tac-toe pattern into the top, using a serrated bread knife. Leave the flour in place for baking; tap some of it off before slicing.


Slide the loaf directly onto the hot stone. Pour 1 cup water into the broiler tray, and quickly close the oven door. Bake for about 35 minutes, or until the top crust is deeply browned and very firm.


Artisan bread sprinkled with poppy and sesame seeds

Allow to cool before slicing.

If you desire cheese in the bread, add about 1 cup of shredded Parmesan cheese with the dry ingredients. Roasted garlic would be a nice addition also. 

By the way, the spell-check recognized all of the ingredients in the peasant loaf.

Enough said.

Enjoy!