Showing posts with label Vegetarian. Show all posts

Monday, July 30, 2012

Chickpea Fritters and a New Giveaway Winner


It's not very often that I eat something fried, but when I do it has to be worth my time and effort. This is the time of year that I would be thinking about making Zucchini Fritters, but since the garden is slow on production, I improvised.

With chickpeas.

Chickpeas, or garbanzo beans, are a staple in my house. I love them in hummus, salads, chili, and now fritters. My youngest granddaughter has been known to eat an entire cup of chickpeas in one sitting. And she's only 16 months old! (She must get her good taste in beans from yours truly.☺)Low in fat, but high in fiber and folic acid, chickpeas are a great way to go meatless without sacrificing protein. They are also incredibly inexpensive, which makes this a very frugal AND gluten-free dish.☺

~The Players~

1 cup gluten-free flour blend (*see below for blend)
1-1/2 t. baking powder
1/2 t. sea salt
1 egg, beaten
3/4 cup milk (can use unsweetened almond, rice, or hemp milk, if desired)
1 bunch green onions, chopped
1/2 cup chopped sweet onion
1-2/3 cups chickpeas, rinsed and drained 
3 Tb. chopped fresh cilantro
3 Tb. chopped fresh parsley
sea salt & ground pepper, to taste
sunflower oil, for frying

*Gluten-free flour blend: 1 cup brown rice flour
2/3 cup sorghum flour
1/3 cup tapioca flour/starch

Sift flour, baking powder, and salt into a mixing bowl and make a well in the center. Add the egg and milk and stir into the flour. Use a whisk to make a smooth batter.


Stir in the onions, chickpeas, cilantro, and parsley.


Heat the oil in a large, heavy skillet. (Cast iron is great!) Add the batter in approximately 1/4 cup sized proportions. Sprinkle with salt & pepper.


Cook for 3-4 minutes; carefully flip the fritter over and cook until golden brown, approximately 3 minutes.


Drain on paper towels. Keep warm while you fry the remaining fritters. Add more oil to the pan as needed.

Enjoy!

*This recipe was adapted from the cookbook, Gluten, Wheat, & Dairy Free.

Sooooooo....since I didn't hear from the first giveaway winner, I have a new winner of the Ball Blue Book of Preserving. Even though it's technically not blue any longer. Winner #2, courtesy of random.org is...
 
Carol Sue!

Congratulations Carol Sue! Please email your mailing address to kimberlyj9 @ live . com (no spaces) and I'll get your book right out to you!


Tuesday, January 24, 2012

Spicy Split Pea Coconut Curry Soup


Ever have one of these days?

Lately I've been having more and more of them. Maybe I have cabin fever. Maybe I've been spending much too much time on Pinterest and am slowly losing brain cells. Maybe this is normal for someone  who is slowly descending into madness.
 
For the record, I haven't arrived at that last destination yet, the bone in the pot is a ham bone. Just in case you were wondering. It is not the leg of a Hobbit.


Promise.

One of our favorite frugal meals is split pea soup. I'm not talking about the yuck in a can either. That stuff can be compared to baby food; lacking flavor and texture, which makes it a little pointless to consume. Because dried peas are pretty bland by themselves, it's important to add flavor. The original recipe calls for light cream to be added at the end, but since we had no cream to add, I improvised.

 Then I improvised some more.

After I found a bigger pot.☺


~The Players~

5 cups chicken stock
5 cups water
1 lb. dried split peas
1 *meaty ham bone
4 Tb. unsalted butter
1 large onion, chopped
2 medium carrots, shredded
1 cup chopped celery
2 cloves garlic, minced
1 Tb. curry powder
1 t. ground coriander
1/2 t. crushed red pepper flakes
sea salt & pepper, to taste
1 can coconut milk

In a large soup pot, (and by large I mean large enough for the bone), combine the stock, water and split peas. Add the ham bone and bring to boil. Reduce heat and let simmer for about an hour.

Meanwhile, in a large skillet, melt the butter over medium heat. Add the onions, celery, garlic, and carrots and saute until onions are translucent. Add spices and cook for 1 minute. Remove from heat.

Remove the ham bone from the peas. When cool enough to handle, remove any meat from the bone and add back to the soup. Add vegetable mixture to the peas and stir well. Simmer on low for about 20 minutes.

Using a blender or food processor, puree half the soup, 2 cups at a time until smooth. Add back to the pot. (I use an immersion blender and eyeball it.)

Pour coconut milk in to a bowl and whisk until smooth. Add to the soup and stir to mix.

Season with salt & pepper. Add more red pepper flakes if desired.

Serve hot.

Enjoy!

*Make it vegetarian by leaving out the Hobbit ham bone.

Tuesday, August 16, 2011

Roasted No Mayo Potato Salad


Some things were just meant to be.

Macaroni & cheese, peanut butter & jelly, Sonny & Cher...

Wait, scratch that last one.

Not all things are meant to be, but a picnic without potato salad, well, that's just wrong on many levels.

Growing up, there were several events that I could count on every summer; camping at the coast without a toilet or hot water for 2 weeks, getting up at 4 a.m. to go strawberry picking so I could buy that pair of $40 bell-bottom jeans, a family reunion with boy cousins that were so cute one could only hide behind a tree, crying, "WHYYYYYYY!!!", and food poisoning caused by Aunt So & So's potato salad that had sat on the table for 8 hours.

I learned a lot of lessons during my summer breaks. I learned to squat at just the right angle, and how to take a cold hose "shower" in the middle of the Salal berry bushes without being seen. I learned that Levi's were a better choice of jeans because unlike $40 bell-bottoms, Levi's never go out of style, and at $1.50/flat, that was a lot of strawberries to pick. I learned that my boy cousins, while cute, had a very limited vocabulary of "home-run", "dug-out", and "first-string", and when they ran out of words, they just stood there with their hands in their pockets, seeing how far each one could spit. (I said cute, not smart.) I also learned to stay away from the potato salad at reunions.

Until now.

Some of us have missions in life to fulfill. Mine was to find a potato salad that would not only taste good, but could sit out on the picnic table for hours and not cause violent retching hours later. If you've never had food poisoning, you won't understand, but I'll try to help you grasp this knowledge. Carol Burnett once described childbirth pain as, "take your bottom lip, pull it over the top of your head..."   

I would rather give birth, standing up on the side of the interstate, to an 18 lb. child, who comes out sideways, with my lip pulled over the top of my head, than go through the torture of food poisoning.

Just sayin'.

Now that you're good and scared of traditional mayonnaise-based potato salad's, give this tangy mayo-free version a try. You may never go back to mayo again.☺

~Roasted Potato Salad~

~The Players~

6 Tb. olive oil
6 cloves of garlic, minced
1 t. sea salt
fresh ground pepper, to taste
4-5 sprigs of fresh thyme leaves, chopped
2-3 sprigs of fresh rosemary leaves, chopped
3 lbs. thin-skinned potatoes, diced to bite-size (use organic!)
2 Tb. citrus-based vinegar (I used a champagne vinegar)
2 t. Dijon mustard
3-4 Tb. olive oil
6 green onions, chopped
1 cup fresh, chopped basil leaves

Preheat oven to 375F.

Mix 6 Tb. olive oil, garlic, salt/pepper, thyme, rosemary, and potatoes together on a large baking pan (with sides). Bake for 45-50 minutes, stirring occasionally, until potatoes are nicely browned and soft.

Remove from oven and allow to cool on counter until room temperature. When cooled, place potatoes in large bowl.

In a small bowl, whisk vinegar, mustard, and 3-4 Tb. olive oil together. Pour vinegar/oil mixture over potatoes and toss to coat.

Add green onions and basil, mixing well.

Check salt and pepper and adjust as needed.

Allow to sit on counter for at least 1 hour to allow flavors to mesh.

And the best part? Serve at room temperature!

Enjoy!


Wednesday, August 10, 2011

Mango & Black Bean Confetti Salad

Recently, I attended my first Pampered Chef party. One of the tasty treats we sampled was Mango Confetti Salsa.

I may have doubled dipped.

Okay, I'm sure I did.

And I have no guilt. Or shame. Because it was amazing.

After I purchased the mango slicer, I booked my first party.

Because of that salsa.

Before the mango slicer came into my life, I was one of those crazy people who would gnaw and gnash, like a rabid dog with a meaty bone, trying desperately to get the mango flesh off of the pit. The pittance of mango that I actually ate was nothing in comparison to the amount of juice, and probably slobber, that dripped from my chin. But still I would try. Until one day when someone actually caught me gnawing and gnashing.

Remember, I have no guilt and certainly no shame, but for the sake of the children, we relocated.

And until now, none of my new neighbors knew about my shady mango past.

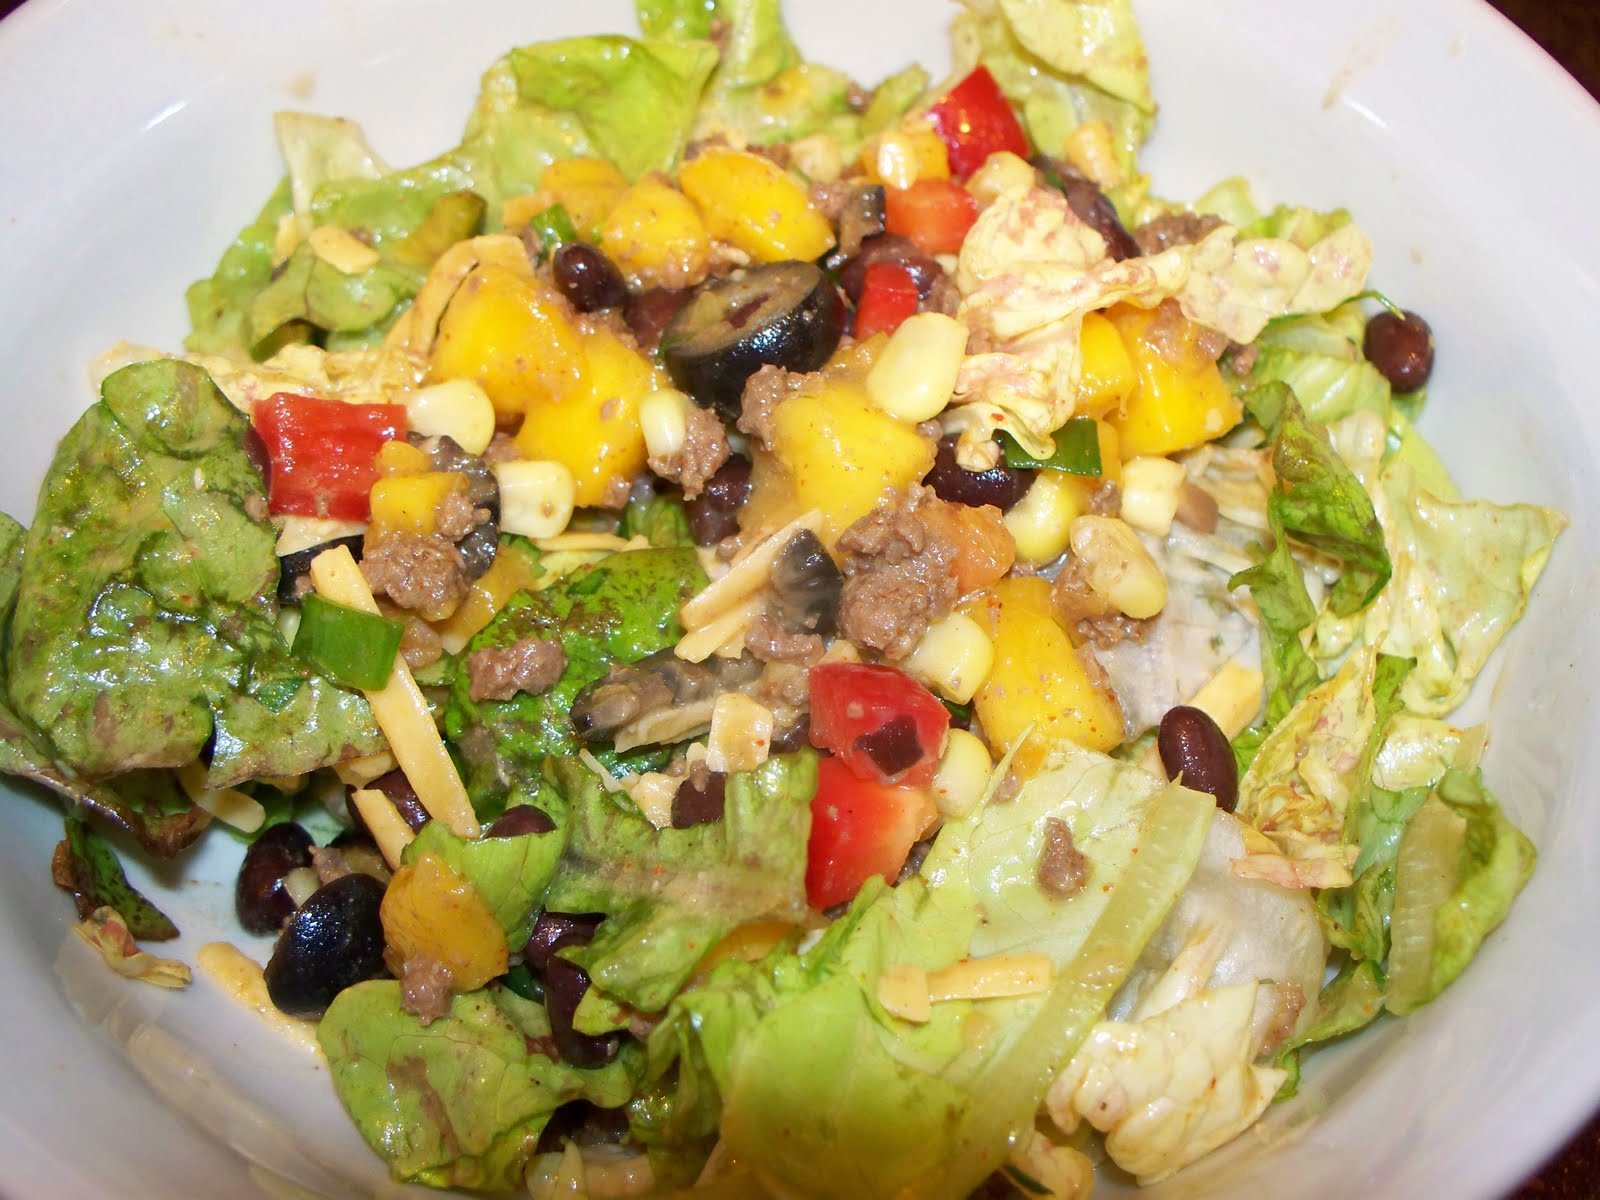
Now that I have the mango slicer, mangoes are back on the menu, and because one can't live on salsa alone (or so I've been informed), I came up with my own version in a salad form. Complete with protein.

Gnawing and gnashing are optional.☺

~The Players~

2 mangoes, diced
1 large, sweet red pepper, diced
1/2 cup chopped green onions
1 can black beans, drained and rinsed
1 fresh jalapeno pepper, seeded and minced (use gloves!)
1 cup sweet corn (if using frozen, thaw by running under water in a colander)
1 cup tomato, diced (I used grape)
zest and juice of 3 limes
2 Tb. olive oil
1/4-1/2 cup fresh cilantro leaves, chopped
sea salt & pepper, to taste

Combine ingredients in a bowl. Can serve immediately, but flavors intensify if refrigerated for 1 hour first.

I've made this several times now and each time is different. Try adding grilled chicken, or taco meat with olives for a different version of taco salad. Or use it as a topping for some fresh caught, grilled salmon.

Guess it's going back on the menu again!☺

Enjoy!

Sunday, August 7, 2011

Crispy Zucchini Fries


Well, now I know. God has a sense of humor. I'm almost sure it is His laughter I hear every time I walk out to the garden and find yet another zucchini.

Some might think it's summer thunderstorms, but I know better.

He's laughing.

This year, the only produce that is growing well in our area seems to be the zucchini, otherwise known as the bane of my existence, or the thorn in my side. I'm not sure why the green beans can't be as prolific as the squash, especially since I really enjoy a fresh, stir-fried, garlicky green bean. I'm unclear as to why the tomatoes, which bring me so much joy as bruschetta, fresh salsa, or nestled in-between the bacon and lettuce of a really good BLT, can't seem to get past the green marble stage before falling off the plant.

What I do know is that I can let The Year of the Zucchini continue to frustrate me, or I can learn to love it.

At the very least, I can disguise it into something I really like.

Like french fries.

Somehow, I think He expected that.☺

I didn't use exact measurements for this recipe, but it really is simple to prepare. You'll want to eat these fries while they're hot, so bake them just before dinner is ready.

~Crispy Zucchini Fries~

~The Players~
zucchini, cut into 4" french fry strips
whole wheat flour (enough to coat fries)
2 eggs
*Panko (at least 2 cups) 
fresh grated Parmesan cheese (about 1/2 cup)
cayenne pepper (about 1/2 t.)
salt & pepper

Preheat oven to 425F.

Cover cookie/baking sheets with parchment paper. This will keep the fries from sticking and will help to brown them evenly.

Put the eggs, and Panko into 2 seperate pie plates or bowls. Add water to the eggs and beat well.

To the Panko, add Parmesan cheese and cayenne pepper; mix well.

 Use a plastic bag and pour the flour into it. Add a handful of zucchini "sticks" to the bag; shake to coat with flour.

Dip the zucchini, one at a time, into the egg wash, then the Panko mixture, coating well.

Lay the "fries" on the parchment paper in a single layer. Sprinkle with salt & pepper to taste.

Bake for 20 minutes, or until golden brown and "crispy".

Eat plain, or serve with warmed marinara sauce.


And make extra~these go fast!

Of course, that may have been my fault.☺

Enjoy!

*Japanese bread crumbs, otherwise known as Panko, can be found in most grocery stores, health food stores, and fish markets.

This post is linked to The Homestead Barn Hop!


Wednesday, July 20, 2011

Fritters, Zucchini Style


The zucchini nightmare has begun.

Somewhere between the first zucchini of the season and the pulling of the spent plant in the fall, I have to try and come up with new and exciting ways to use this prolific summer squash.

I don't know if I've mentioned this before, but I really don't like zucchini.

At all.

I was the child who would still be sitting at the dinner table, hours after dinner was actually over, lamenting over the fact that my parents couldn't possibly love me if they were forcing me to eat a food that caused violent retching and possible convulsions.

I'm fairly certain that zucchini played a role in my pre-pubescent acne epidemic, and was probably the cause of Mt. St. Helens erupting in 1980 too.

My parents also called me "dramatic", but I think I was just misunderstood. (Clearly.) See, it's not as if I didn't like green foods. I loved sour apple Jolly Ranchers. Green jello made me smile and a tall glass of lime Kool-aid made me downright swoon. In fact, I'm fairly certain that I consumed every color of the rainbow in the Kool-aid department, but put a plate of zucchini in front of me, and green became my nemesis. 

As an adult, I love to grow zucchini in the garden, but that's where it ends. Unless that veggie is hidden in layers of chocolate, and flour, I still have issues with it. Unfortunately for me, my family LOVES zucchini. And not just the green stuff either. They like every kind of squash out there and expect me to prepare it for them!

Will this nightmare ever end?

Yes!

I have discovered Zucchini Fritters and life will never be the same.

Just please don't tell my children...I'm not done martyring myself yet.☺

~Zucchini Fritters~
~The Players~

4 cups grated zucchini
4 eggs, beaten
1/2 cup chopped onion
2-3 cloves garlic, minced
1 Tb. dried parsley ~or~ 2-3 Tb. fresh parsley, chopped
1 cup flour (I used brown rice flour to make it gluten-free.)
1 cup grated Parmesan cheese (not the stuff in the can!)
salt & pepper, to taste
expeller-pressed coconut oil for frying

Mix all ingredients except for the coconut oil in a large mixing bowl. In a heavy skillet, heat a few Tb. of coconut oil to medium hot. Drop batter into skillet to make 3-4 inch pancakes. Cook for about 2 minutes on one side, or until edges turn brown.
Carefully turn the fritters over and cook another 2 minutes. Remove and lay on paper towel to absorb excess oil. Cover to keep warm. Continue to cook remaining batter, adding more coconut oil as needed.
Serve with sour cream.

Enjoy!

I'm linking up with The Homestead Barn Hop~C'mon over!

Thursday, June 30, 2011

Sweet & Spicy Pickles


Once upon a time, there was a dill pickle. The dill pickle was always comfortable being a dill, but had aspirations to be more than just a condiment on top of grilled burger.

It had dreams of topping egg salad.

And in a perfect world, just being eaten straight out of the jar.

A couple of years ago, my in-laws decided to pull us out of our dill pickle comfort zone. Initially, I declined to try one of their newly discovered pickles, but after hearing the "ooohs and ahhhs" of my Mister, I relented.

Since then, not a day has gone by that we've been without having these dill pickle converts in our fridge.

This is by far the easiest "canning" recipe I have ever used. It requires no canning and uses dill pickles that can be picked up at Walmart for just a couple of dollars. Within 3 days, what once was dill is now sweet & spicy.

It's magic.

~Sweet & Spicy Pickles~

I had these on hand, but prefer the Vlasic from Walmart.

~The Players~
1/2 gallon kosher dill pickles
1 cup apple cider vinegar
1/2-1 cup sliced, canned jalapenos
4 cups organic sugar
1/2 gallon jar with a tight-fitting lid

Drain the dill pickles in a colander for about 2 hours.


Cut pickles into 1/4" slices.  Put into a half-gallon jar.


Shake the jar to help settle the pickle chips. In order, add jalapenos, sugar, then the vinegar. You may need to add the sugar slowly and allow it time to fall down into the jar. I used a butter knife to create little "canals" for the sugar to drop into. Do not add the vinegar until all of the sugar is in the jar though.


After the vinegar is added, cover top of jar with plastic wrap before screwing the lid down tight.


Turn the jar upside down and set in a pie plate. (Just in case the jar leaks!)


Flip the jar 2-3 times a day for 3 days. The sugar will dissolve and you will be left with a sweet pickle that has a little "kick" to it.

Now if you'll excuse me, I've got some egg salad to make!

Enjoy!


Thursday, February 24, 2011

Black Bean Burgers w/ Corn Salsa


Dear Paula Deen,

     Thank you for making the Food Network a fun place to visit. Thank you for not going all Hollywood on us by hiring a vocal coach to overcome your sweet southern accent. Thank you for putting the sweet back in iced tea and bringing the mint back to the julep. Thank you for putting buttah back into the kitchen, even if it took me a while to figure out what buttah meant. And most importantly, Ms. Deen, thank you from the bottom of my heart for introducing me to Black Bean Burgers and Corn Salsa, even though I had to "tweak" your recipe just a tad. If you ever need a taste tester, I'm your gal.

Sincerely,

Me

As promised, here's my version of Paula's recipe. I hope you love it as much as I do!

*It's a good idea to make the Corn Salsa first and refrigerate. It will allow time for the flavors to mesh, and more importantly, your corn won't still be frozen by the time dinner is ready.

Just sayin'.

Black Bean Burgers

~The Players~

2 (15 oz.) cans organic black beans, drained and rinsed (or about 4 cups home-cooked)
1-1/2 cups panko (I found organic panko at Whole Foods)
1 (4 oz.) can chopped green chilies, drained (or roast, peel and dice an Anaheim or Poblano pepper)
1/4 cup green onion, minced
1 t. chili powder
1 t. ground cumin
1/2 t. sea salt
oil for frying (beef tallow, coconut oil, lard)
6 organic corn tortillas
Corn Salsa (recipe follows)
Optional: sour cream for garnish

In the bowl of a food processor, combine black beans, panko, chilies, green onion, chili powder, cumin, and salt. Process until mixture is smooth.


Shape black bean mixture into 6 burgers.

In a large cast iron skillet, heat a couple of tablespoons of oil over medium heat. Add the black bean patties, and cook, for 3-4 minutes per side, or until heated through. Repeat until all the burgers are finished. Set aside, and keep warm.

In the same skillet, heat a couple more tablespoons of oil over medium-high heat. Cook tortillas, 1 at a time, for 1 minute per side, or until lightly browned and crispy. Drain on paper towels.

Place 1 black bean burger on each corn tortilla. Top each with Corn Salsa. Add a dollop of sour cream. Serve immediately.

~Corn Salsa~

2 cups frozen organic corn, thawed (Use fresh in the summer!)
1 cup diced tomato
1 (4 oz.) can of green chilies (or roast your own for best flavor!)
2 Tb. green onion, minced
zest and juice of 2 organic limes
1-2 Tb. fresh cilantro, minced
1/4 t. sea salt

In a medium bowl, combine corn, tomatoes, green onion, lime zest and juice, cilantro, and sea salt. Cover, and chill.

Thank you Paula Deen!

Enjoy!

*Unfortunately, only 2 of my pictures made it to the computer. It appears that a little camera thief may or may not have deleted the rest. And yes, the case is still pending.

This post is linked to Fight Back Fridays at The Food Renegade.

Monday, January 24, 2011

Lentil Burritos


When I began this blog, with only a smidge less knowledge than I possess now, my intention was to have a place to share favorite recipes along with life and the lessons learned along the way. For the most part, I've been able to do as I intended.

But, because of my challenged computer skills, I haven't been able to figure out how to add cute little tabs for various subjects, so everything is kind of a jumbled up mess. Instead of hiding my head in shame however, I have embraced my incompetence in this area. With my head held high, I will continue on. Mainly, I've been doing what some of you have to do~search (frantically, for me) through the mess, looking for that one, or 20, recipes that I've posted without a picture. Those recipes that I know I've shared, but can't really remember where.

I call them The Lost Recipes. I'll be pulling earlier recipes out of the hidden recesses of my brain...er...blog, and re-posting them under their appropriate labels, making them easier to find. So, if some of them look familiar, just know that you are not losing your mind, nor are you having an episode of deja vu. Pretend, for my sake, that these are brand new, never before seen recipes.

I beg of you.

This is one of those recipes that should never be misplaced. Ever. Not only are Lentil Burritos frugal, meat-free and delicious, they are also considered a "fast food" in our house. It is also one of the recipes that cannot be messed up.

Even by me.☺


Lentil Burritos

~The Players~

3/4 C. dry, organic brown lentils
3/4 C. dry, organic brown rice
4 C. **beef broth (or 4 C. water and 1-1/2 Tb. organic beef soup base)
4 t. chili powder
1 t. dried cumin
2 t. onion powder
1/2 t. garlic powder
Optional: grated Cheddar cheese, sour cream, guacamole

Dump everything into a medium pot and bring to boil. Turn down the heat to medium low, cover, and continue to cook until all of the liquid is absorbed and the rice is done; approximately 45 minutes. Stir a couple of times while cooking.

Use as filling in the tortilla of your choice. We like to add a little grated cheese and serve with sour cream/ guacamole. ☺

Serves 4.
(I always double this and keep any extra in the fridge for a quick lunch later in the week.)

*For crispy burritos, lay wrapped burritos on cookie sheet. Lightly brush each burrito with olive oil and bake in 375F. preheated oven for 10-15 minutes, or until lightly browned.

**To make a vegetarian version, omit beef broth and use vegetable broth instead. 

Enjoy!


Tuesday, November 23, 2010

Raw Cranberry Relish

In honor of Thanksgiving and the cranberry that tries to be the shining star of the meal, I am reposting a recipe that I originally shared back in March. I'll be serving a traditional cranberry sauce, but will also serve this version, packed full of enzymes to help digest the rest of dinner.

Maybe the cranberry really is the shining star.

A few months ago, I decided to go "raw".

It lasted until dinnertime.

And, it was not one of my finer moments.

Since then, I have had great respect for anyone who feels convicted enough in their beliefs to choose a path and stick to it.

My path has lots of roots poking up out of the ground. I'm forever tripping over my own ideas and plans. I start down one path, see an obstacle, then switch paths, only to find myself switching back a little while later.

It makes me dizzy.

That's not to say that I am going back to raw. Hardly.

I like meat. And I like it cooked.

What I'm saying though, is with our experiment of eating fresh and local, I'll be adding some raw recipes to the mix. There will also be some steamed, sauteed, roasted, grilled, fried, baked and poached recipes. And whatever else I can come up with.

For dinner tonight, we enjoyed a roasted turkey, for no other reason than we had it in the freezer. We also had creamed, red, Swiss chard on fresh sourdough bread and raw cranberry relish on the side.

Since we have a freezer full of cranberries, we'll be enjoying this relish for awhile!


2 cups washed, raw cranberries (can be frozen, just thaw slightly)
2 peeled, cored Granny Smith apples (or other tart apple)
1 large, organic, unpeeled orange, cut into sections
1 cup organic sugar (I used the full cup, but next time will only use about half.)

Process the cranberries, apples and orange in food processor. Pulse until everything is chopped, but not mushy. I call it medium-chopped.

Pour into a bowl and add sugar. Stir well and refrigerate for at least 2 hours before serving.

The colors were so brilliant, I wish they would've showed up better on film. Even outside, it's hard to convey just how pretty this is.

*Cranberries pack a nice little punch in the nutrition department.

Per 1 cup of raw cranberries:

44 calories
11.5 g. carbohydrates
4.4 g. fiber
8 mg. calcium
6 mg. magnesium
12 mg. phosphorus
81 mg. potassium
12.4 mg. vitamin c

Enjoy!

Thursday, October 7, 2010

Blueberry Applesauce


Kids like colors. They like weird colors, in fact.

And they really like it when their food represents their weird color fetish.

This is how blue applesauce came to be. Some "genius" decided that since Blue's Clue's was such a popular show, they would market applesauce with Blue on the label, and color the sauce to match. Apparently, this idea made the applesauce company a lot of money, so they decided to make blue applesauce a permanent product.

I was going to pick some up in town today, but decided that that would be sending the company the wrong message. I didn't want my purchase to put their sales over the top, thus resulting in more money for them to create more blue applesauce.

That, and I forgot.  

Here's my problem with this. Blue dye #1. It has been linked to causing behavioral problems in children. I've seen this firsthand. My daughter, Valerie, used to throw wicked temper tantrums after being fed Skittles at preschool. I didn't know what it was at the time, but was contemplating an exorcism.

And I'm not even Catholic.

Another "treat" that Valerie enjoyed was blue-raspberry slushies. Hmmm....

I'm not a doctor, nor do I play one on t.v., but I was able to diagnose and treat her just by eliminating Skittles and slushies! Valerie is now a happily married nurse, who no longer requires her mother sitting on her while she thrashes about. 

Lucky for her. 

If a child is accustomed to eating blue, green, red, or purple food, it may be difficult to transition them to a healthier alternative. When we were doing foster care, we had a couple of boys who wouldn't eat anything that didn't come from a can or box. If I made a large pot of homemade chicken noodle soup, it would go untouched by them unless I could show them the can. So I got smart. I bought a large can of soup, dumped it into the chicken bucket, washed it out and hid it in the cupboard. Whenever I needed to show them a can, out it came. I eventually removed the label so I could use this can as "proof" with different kinds of soup. Funny enough, the boys ate my homemade soup.

And they liked it.

So, as a parent, we have to learn how to market our products. If a child wants strawberry milk, give them strawberry milk. With real strawberries. And if they want blue applesauce, give them blue applesauce.

Minus the blue dye #1.

~Blueberry Applesauce~

Wash, peel, quarter and core 10 apples. I used Jonagolds, but you can use any or several different kinds. (This is a good way to use up apples that may be past their prime too.)

As you quarter the apples, put them in a bowl of cold water that has 1-2 Tb. of lemon juice in it. This will prevent the apples from turning brown.

When you have your apples ready, put them in a large *stainless steel pot. Add 1/2 cup water to the apples. Turn the heat to medium. When the apples start to bubble, turn the heat down to low and cover the pot. Let cook for about 15 minutes.

Remove lid and add 1-2 cups frozen blueberries. The more blueberries you use, the bluer the sauce. Replace lid and turn off heat. Let sit for about 5 minutes.


In a food processor or blender, process small batches until smooth. Be careful~it's very hot!

Don't ruin the goodness of this sauce by adding corn syrup or white sugar. If you need to sweeten it, use natural sweeteners, such as; real maple syrup, rapadura/sucanat, honey. (Remember not to use honey in kids younger than 1 year of age.)


My "blue" applesauce appears more pink in this picture, but that is not the applesauce's fault.

Blame the camerman...er....woman.

I freeze our applesauce in quart containers, but you could also water bath can them. For baby food, freeze in ice cube trays.

*If you use an enamel coated pot to cook the apples in, watch the heat closely. The apples tend to burn to the bottom of the pot.

Or so I've heard...

Enjoy!

This post is linked to Food Renegade's Fight Back Friday.

Thursday, September 30, 2010

Zucchini, Tomato & Corn Casserole


I wish I could come up with a better name for this casserole as it deserves only the very best. And this is coming from a girl who is not really a fan of zucchini. How about "The End of Summer Casserole"?

Sometimes, I can be persuaded to eat the summer squash and not think about my tortuous childhood. I spent HOURS sitting at the table, after everyone else was finished, dishes were done and "Happy Days" was on the television before my dad would take pity on me and snatch the wretched veggie away from me.

Of course, my mom didn't know.

So why would I make anything that has zucchini in it? Or for that matter, grow it?

Because this is good.

Good enough to make me forget how much I dislike zucchini. (Besides, the zucchini plant is indestructible and makes me look like I know what I'm doing in the garden!)

~The Players~

1 lb. zucchini, unpeeled and chopped
1/2 sweet onion, chopped
2 cloves garlic, minced
2 eggs, beaten
2 cups sweet corn
1 cup tomatoes, chopped 
 1 cup shredded mozzarella cheese
1/4 t. sea salt
1/4 t. pepper
paprika


Butter a 9x13" dish.


Mix corn, 3/4 cup cheese, eggs, onion, garlic, salt & pepper. Set aside.


Steam zucchini until tender. Add zucchini to the corn mixture.


Gently stir in the tomatoes. Pour mixture into buttered dish. Top with remaining cheese. Sprinkle with paprika. Bake in a 350F. preheated oven for 45 minutes. Let stand for 5 minutes before serving.


You may have noticed, because you are smart and nothing gets by you, that there are no tomatoes in this dish. That's because I got side-tracked.

I'll share that tomorrow!

Enjoy!

Monday, July 12, 2010

White Zinfandel Pasta Sauce

Disclaimer: I am not a photographer.

Please do not hold it against the pasta sauce!

Have you ever noticed the size of the pasta aisle at the grocery store? Jar after jar of sauces that have almost identical ingredients, but varying prices. The really cheap stuff has added high-fructose corn syrup, soybean oil, and no expiration date, the more expensive versions have...well, more expensive packaging.

And don't even get me started on the sauces with meat in them. Blah.

One of the more expensive, organic brands that I was looking at had Zinfandel as an ingredient. It also had tomato puree, tomato paste and spices. I suddenly had a moment of brilliance.

I could create my own version and save the $5.oo per jar cost!

Couldn't I?

Simply said, yes.

And it was good.


~The Players~

2 medium yellow onions, diced
3 stalks celery, diced
3 cloves garlic, minced
8 oz. fresh mushrooms, chopped
1/2 cup fresh basil, chopped
1/4 cup olive oil + 2 Tb. for sauteing
1 t. dried oregano
1 scant teaspoon sea salt
1/4 t. black pepper
1 quart canned tomatoes, broken up (or the equivalent of)
1 small can tomato paste
2 Tb. packed brown sugar
1 cup White Zinfandel
1 bay leaf, broken in half

In a heavy pan, saute the onions for about 3 minutes in some olive oil.


Add the celery and garlic and continue to cook for a couple minutes more. Add more olive oil if necessary.


Slice mushrooms, then roughly chop. Add to the onions and cook a couple of minutes longer.


Come closer. Can you smell it yet?


Dump the jar of tomatoes and can of tomato paste into a large pot. Stir well.

Add the brown sugar.


Add the chopped basil to the tomatoes, along with the salt, pepper, and dried oregano.


Remove the onions from the heat and dump them into the tomato sauce pot.

Add the White Zinfandel and stir well.


Add the 1/4 cup olive oil and the bay leaf.

Bring the sauce to a boil; reduce heat and simmer with a lid on for 2 hours, stirring occasionally.

Or, if you prefer, place in a crockpot and cook on low for 4-6 hours.


Serve with your favorite pasta and sprinkle with fresh grated Parmesan cheese.

Mmmmm....

*This made enough for my family...times 2!